Downsizing a GaAs wafer by scribing and cleaving
LatticeGear in the Lab: FlexScribe
Dr. Matt Kim, Founder and President, QuantTera
QuantTera routinely uses LatticeGear’s FlexScribe when cleaving their semiconductor materials. For GaAs semiconductors, the FlexScribe facilitates repeatable and accurate wafer cleaving. Here we present QuantTera’s standard process for downsizing a 4” wafer to small pieces using the FlexScribe equipped with a diamond wheel, which makes it a more versatile tool for scribing semiconductor materials with both fragile and hard surfaces.
Introduction
GaAs substrate technology is standardized at 4” and 6” wafer sizes. In the research environment, one typically does not use the full wafer when fabricating devices. Getting the full use of, for example, a 4” GaAs wafer, necessitates cleaving of the wafer. One could saw the wafer but that is usually prohibitive since the waste water created has heavy amounts of arsenic. GaAs has natural cleave planes along the (110) crystal plane. With proper cleaving technique, one can get a perfect crystal plane. Good cleave planes are also very important for the fabrication of lasers since the cleave planes can form the laser facets. In fact, edge emitting lasers can be made easily, since the laser cavity can be formed by cleaving a front and back mirror plane.
At QuantTera, we typically we work on 4” GaAs wafers, and when we fab- ricate our devices, we typically cleave the wafer into many different sized pieces. Also, we can cleave wafers very accurately down to 2.5 mm widths. If narrower cleaves are required, we will then thin the wafer pieces to get smaller widths.
Our procedure
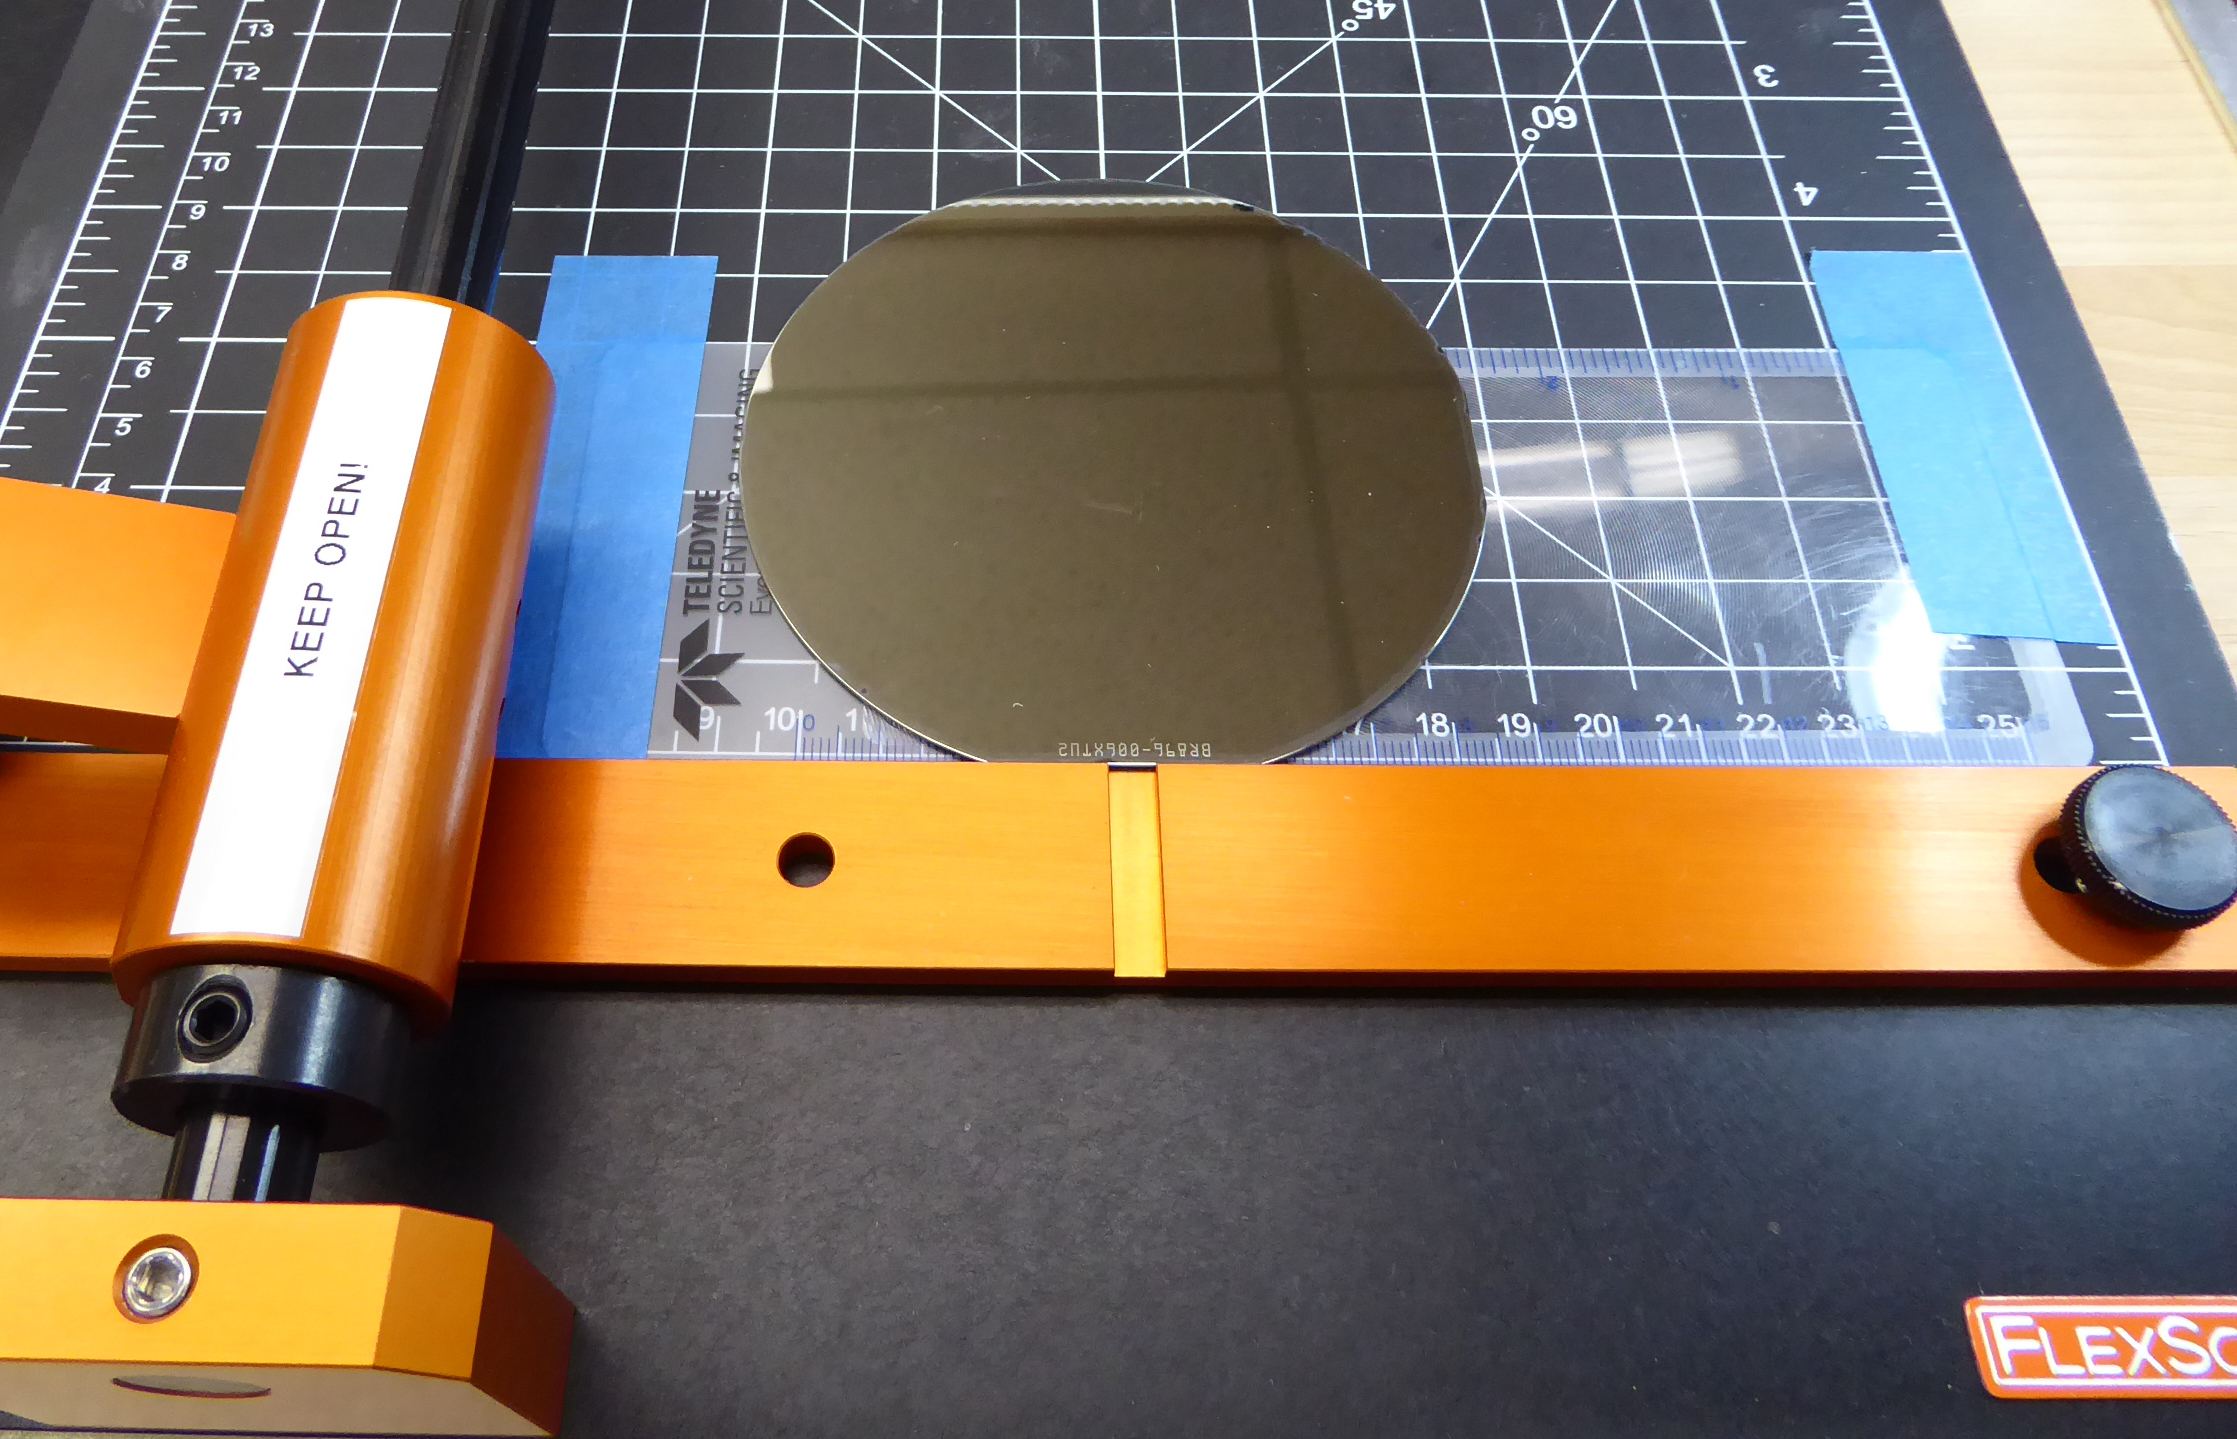
The first cleave is usually along the middle of the primary flat, with the epi-side up. Generally, we never scribe the back side, especially if it is un- polished. We just gently scratch the edge of the wafer (no pressure used);the typical length is about 3 mm long.
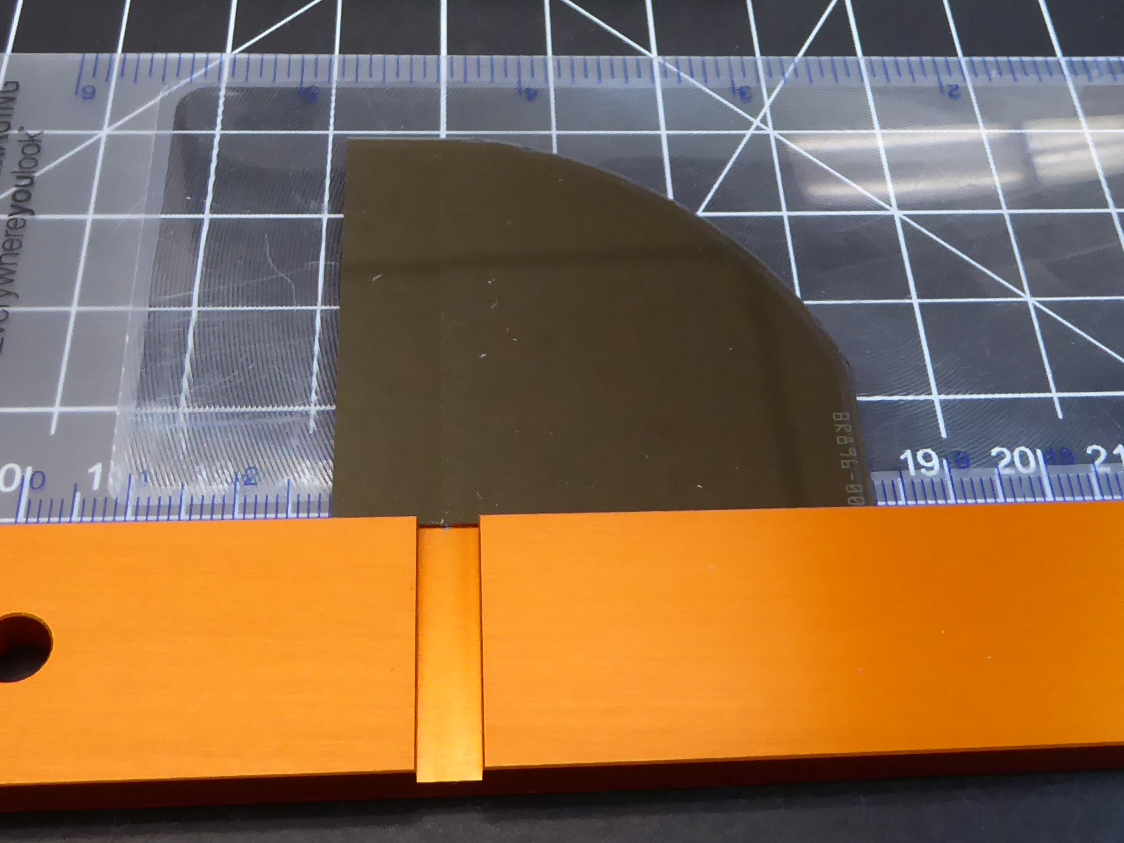
After scribing, we place the wafer on a pad* with edge of the scribe lining up with the edge of a thin pad, and then we very gently press. The scribe line should occur and propagate down the wafer automatically. If you force it, you will see clear steps along the scribe edge showing that you did not get a clean cleave. Practicing on scrap wafers is best to develop good tech- nique. Figure 2 shows the placement of the wafer on the thin pad.
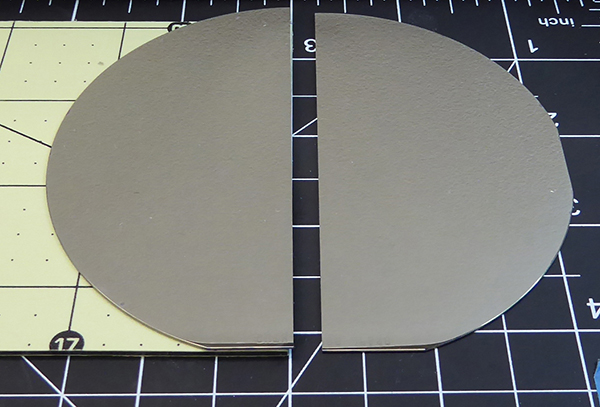
Next we cleave the half wafer perpendicular to the original cleave line using the same technique, shown here in Figures 2A and 2B. After gently pressing the edge of the GaAs wafer, the cleave naturally occurs.
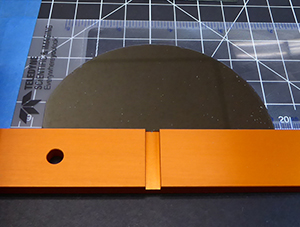
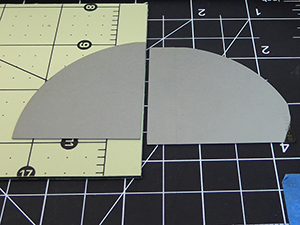
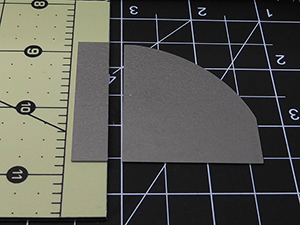
Finally, we will cleave the quarter wafer by taking out a 1 cm wide strip, using the exact same procedure. The FlexScribe makes this very easy since you are repeating the same process over and over. Figure 3 shows the basic process.
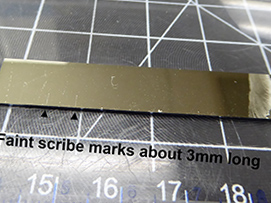
At this point we can cleave the 1 cm piece to the desired size. In this case we will make three 5 mm x 10 mm pieces. We line up the 1 cm GaAs strip along the ruled grid and have the diamond scribe placed 5 mm from the left-most edge. We gently scribe that point. We move the 1 cm piece over to the left by 5 mm to get the second 5 mm x 10 mm piece, then gently scribe. We repeat the process, moving the 1 cm piece over 5 mm to get the third 5 mm x 10 mm piece. Figure 4A shows the alignment of the
1 cm piece in the FlexScribe. Figure 4B shows the three faint scribe lines in the GaAs piece. These pieces were cleaved using the same thin pad.
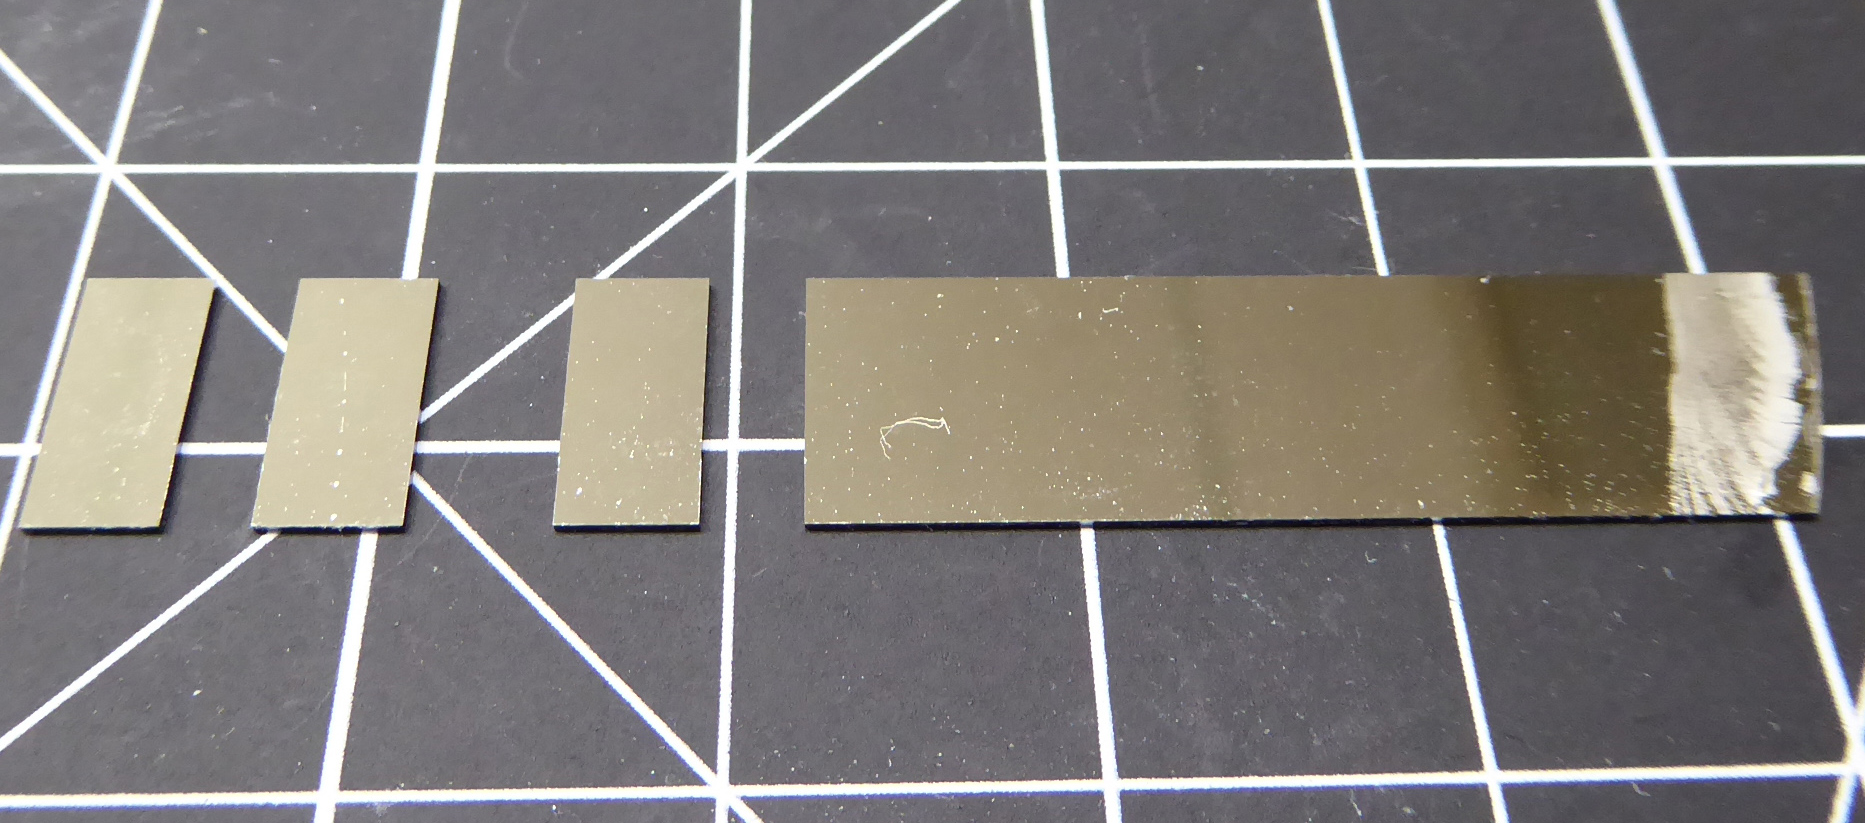
The three pieces were cleaved using the same thin pad and the gentle press technique, one right after the other. Figure 5 shows the results of the work.
Note that the FlexScribe makes cleaving numerous samples very easy and repeatable. Also the tool allows the process to be identical for every cleave.
* Pads are seamstress measuring pads available at fabric or variety stores.

In Conclusion
-
We highly recommend the diamond wheel, since very minimal pressure is needed.
-
The FlexScribe tool allows ease in making the scribe mark perpendicular to a flat or cleave plane of the wafer.
-
The pad on which we place the pieces, position- ing the scribe mark over the edge, does not need to be very thick, since we are using a minimum amount of pressure to make the cleave.
For a PDF of this publication, contact lg@latticegear.com) or for downloadable copies of these publications you must be registered and signed in
About the Author
Matt Kim is an experienced entrepreneur/technologist for the development of novel processes and nano-engineered device structures for telecommunication industry. He is a fellow of the American Physical Society and President of QuantTera. QuantTera is a company known for the development of integrated transistor materials and devices for high efficiency, rugged wireless and photonic applications.
About LatticeGear
Founded in 2012, on the principle that scribing and cleaving are the most accurate, fast, easy and repeat- able solution for many sample downsizing scenarios. LatticeGear products have helped technicians, engineers and researchers increase throughput and productivity for their sample preparation workflows.
From kits that take the guesswork out of selecting sup- plies for a specific use case, to compact desktop scribing and cleaving machines designed for speed, ease of use and high quality results, LatticeGear products are alleviating sample preparation challenges in materials research and failure analysis labs around the world.
LatticeGear LLC • 7431 NE Evergreen Parkway • Suite 130
Hillsboro, OR 97124 • +1-503-828-0040 • US Toll Free: 1-800-430-8210
sales@latticegear.com • latticegear.com
LatticeAx and FlipScribe are registered trademarks of LatticeGear.
23-112120
